Young Mazda
Young Mazda
Young Mazda
Young Mazda
Young Mazda
Young Mazda
Young Mazda
renders for @brenkmanandcompany
renders for @brenkmanandcompany
renders for @brenkmanandcompany
renders for @brenkmanandcompany
renders for @brenkmanandcompany
renders for @brenkmanandcompany
renders for @brenkmanandcompany
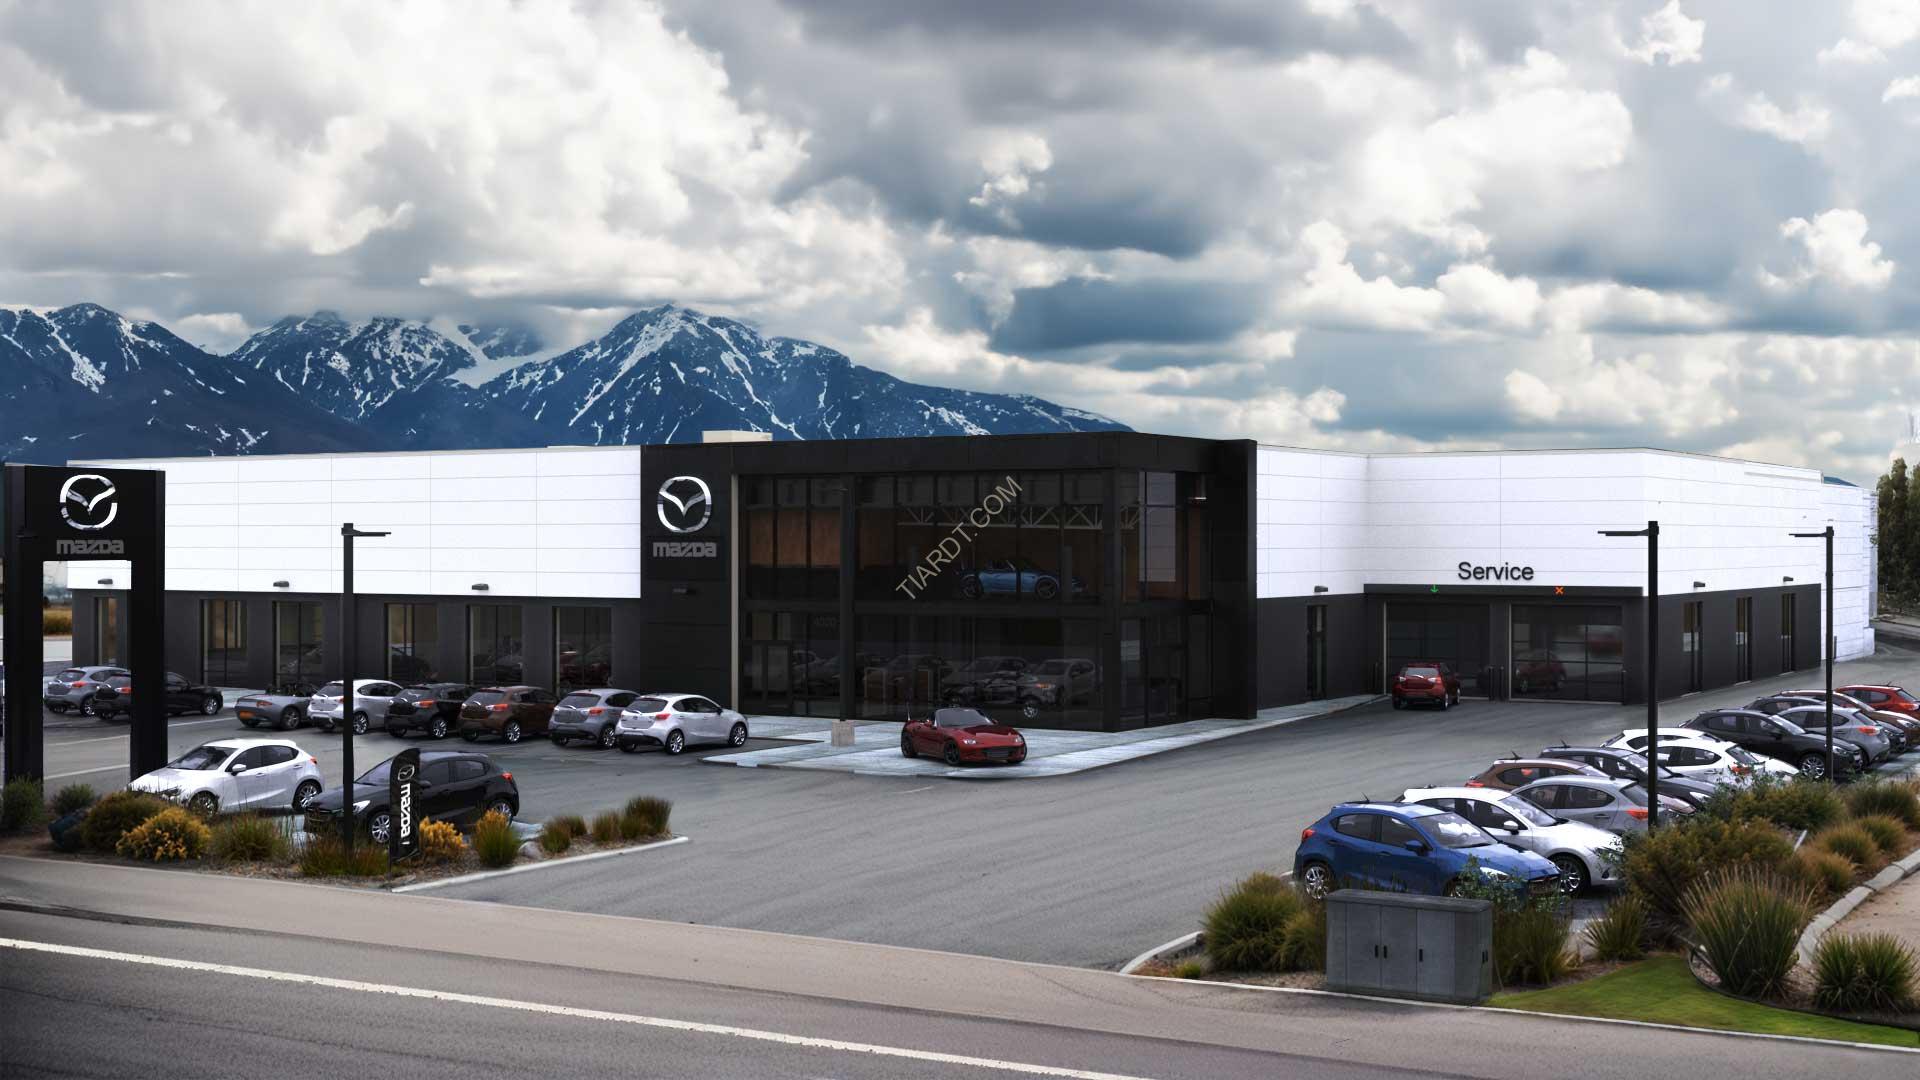


Project Scope Overview
Location: Young Mazda, 4020 S Riverdale Rd, South Ogden, Utah 84405
Objective:
Project Pipeline for the Young Mazda HVAC Showcase Project:
1. Client Meeting & Initial Understanding:
2. Questionnaire to Gather Specifics:
Type of Renders Needed:
I asked whether they needed interior, exterior, or animation renders, depending on how they wanted to present their HVAC integration.Render Style:
I inquired about the style they envisioned—photorealistic, wireframe, cut-out, or sketch—and whether the setting should be depicted in daytime or nighttime, summer or winter, and if the space should appear active with staff and cars or empty for a cleaner focus on the HVAC system.Location Details:
I asked where the Mazda dealership is specifically located (Young Mazda in South Ogden, Utah), ensuring that the render would match the exact environment of the site.Project Files and Models:
I then asked whether they had project files of the building, such as AutoCAD drawings or BIM models. I also checked if they had detailed models of the HVAC systems that they use for their design purposes or if they needed me to model the systems and building from scratch. Often, clients already have these files since they use them for their own design and planning.Point of Contact for Models:
I inquired if there was a specific person I could contact to obtain high-detail building and HVAC models, and for permission to use those models in the render project.Showcase Focus:
Next, I asked if there were any particular HVAC systems, building features, or angles they wanted to emphasize. This could include highlighting the unit heaters, radiant tube heaters, or specific vehicle exhaust systems within the garage.Visual Representation of HVAC in Action:
I also checked whether they wanted additional graphics to indicate how the HVAC systems function—like using arrow vectors to show airflow and heat regulation—or any other way to visually demonstrate the HVAC "in action."Usage and Optimization Needs:
I clarified the intended use of the renders—whether for web (requiring web-optimized images) or print (requiring print-ready high-resolution files). Usually, I combine all necessary versions into a single zip file for easy access.Time Frame or Deadline:
Finally, I asked about their desired time frame or deadline for delivery, ensuring that I could align my workflow with their schedule and complete the project on time.
3. Design Process:
4. Regular Updates:
5. Presentation of Final Renders:
6. Payment:
Design Process:
1. Gathering Information & Preparing for the Render:
- Collect all information, images, and models provided by the client.
- Convert models, if necessary, to ensure compatibility with 3ds Max or other modeling software.
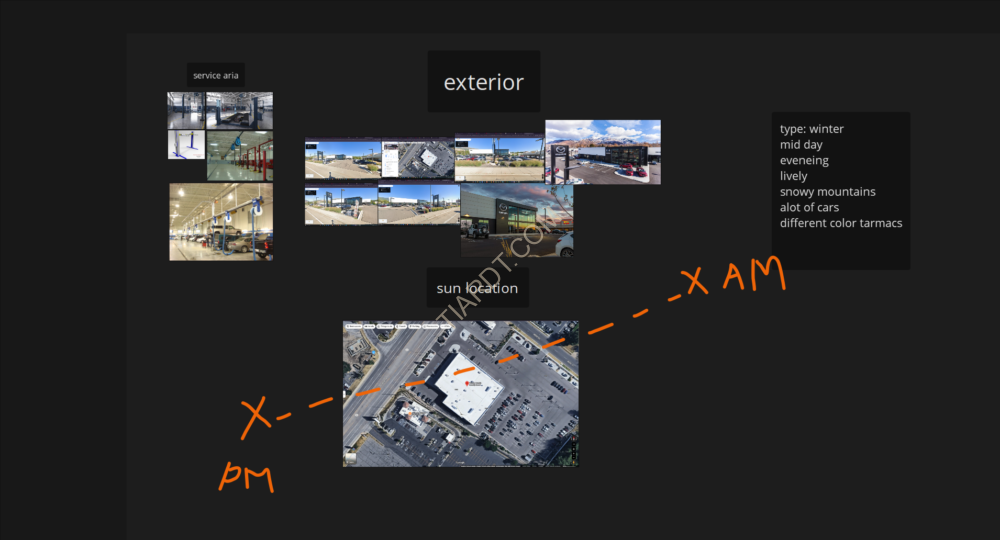
- Conduct additional research to find more images or references if the building is already constructed, focusing on:
- Styling and architectural details
- Types of materials used in the building (e.g., exterior cladding, roofing materials)
- Window styles, frames, and glass types
- Any distinct design features or building finishes.
- Use Google Maps to understand the environment around the building, noting:
- Neighboring buildings
- Road textures
- Distinct scenery like mountains, trees, etc.
- Organize all references and screenshots using a tool like PureRef for easy access and navigation.
- Determine the position of the sun to accurately simulate natural light and shadow direction.
2. Downloading & Preparing Props and Models:
- Download or prepare various props and models that might be needed in the scene, including:
- Cars, trees, grass, and other elements to populate the environment.
- HDRI maps for accurate lighting and reflections.
- High-quality texture sets for realistic surfaces (e.g., concrete, metal, glass).
- Ensure all models and textures are optimized for use in 3ds Max or other rendering software to maintain a smooth workflow.
- Organize these assets into a library for quick access during the scene-building process.
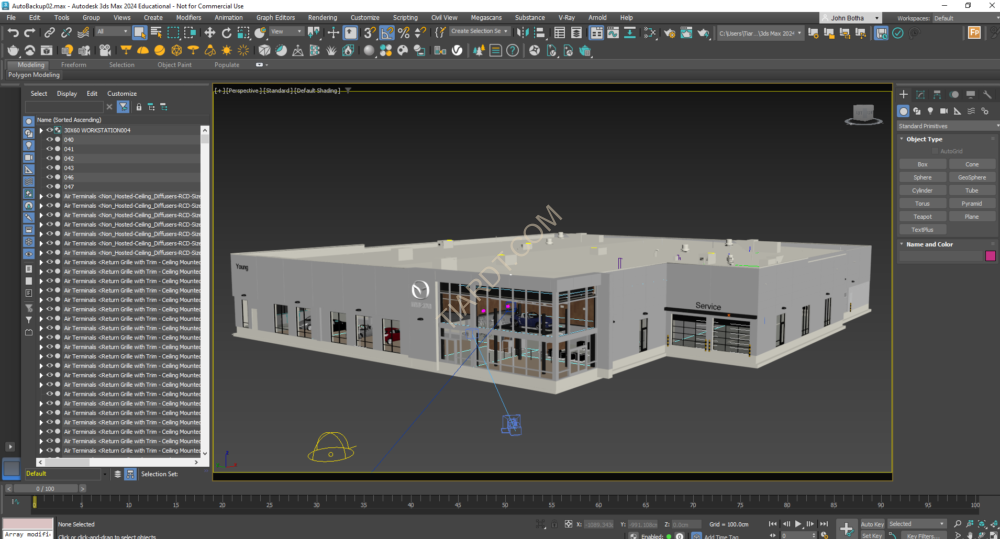
3. Base Scene Setup:
- Import the models of the building and HVAC systems into the 3ds Max scene.
- Ensure the scene is scaled correctly to match real-world dimensions.
- Set up initial lighting using HDRI maps and interior lights.
- Configure V-Ray render settings for optimal performance.
- Adjust V-Ray environmental settings, such as global illumination and atmospheric effects.
- Place the imported models and props in the scene, aligning with the layout of the real location.
- Verify the positioning of all elements, including HVAC components.
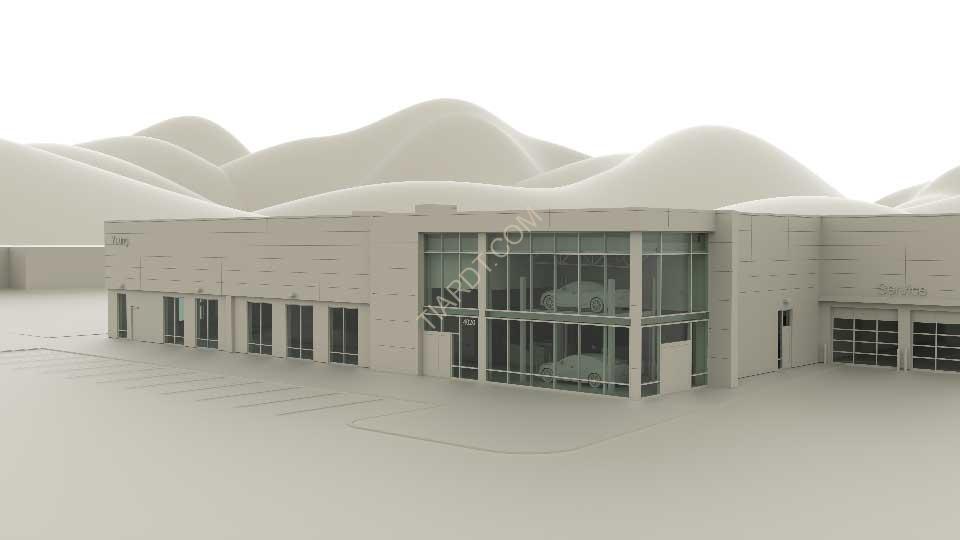
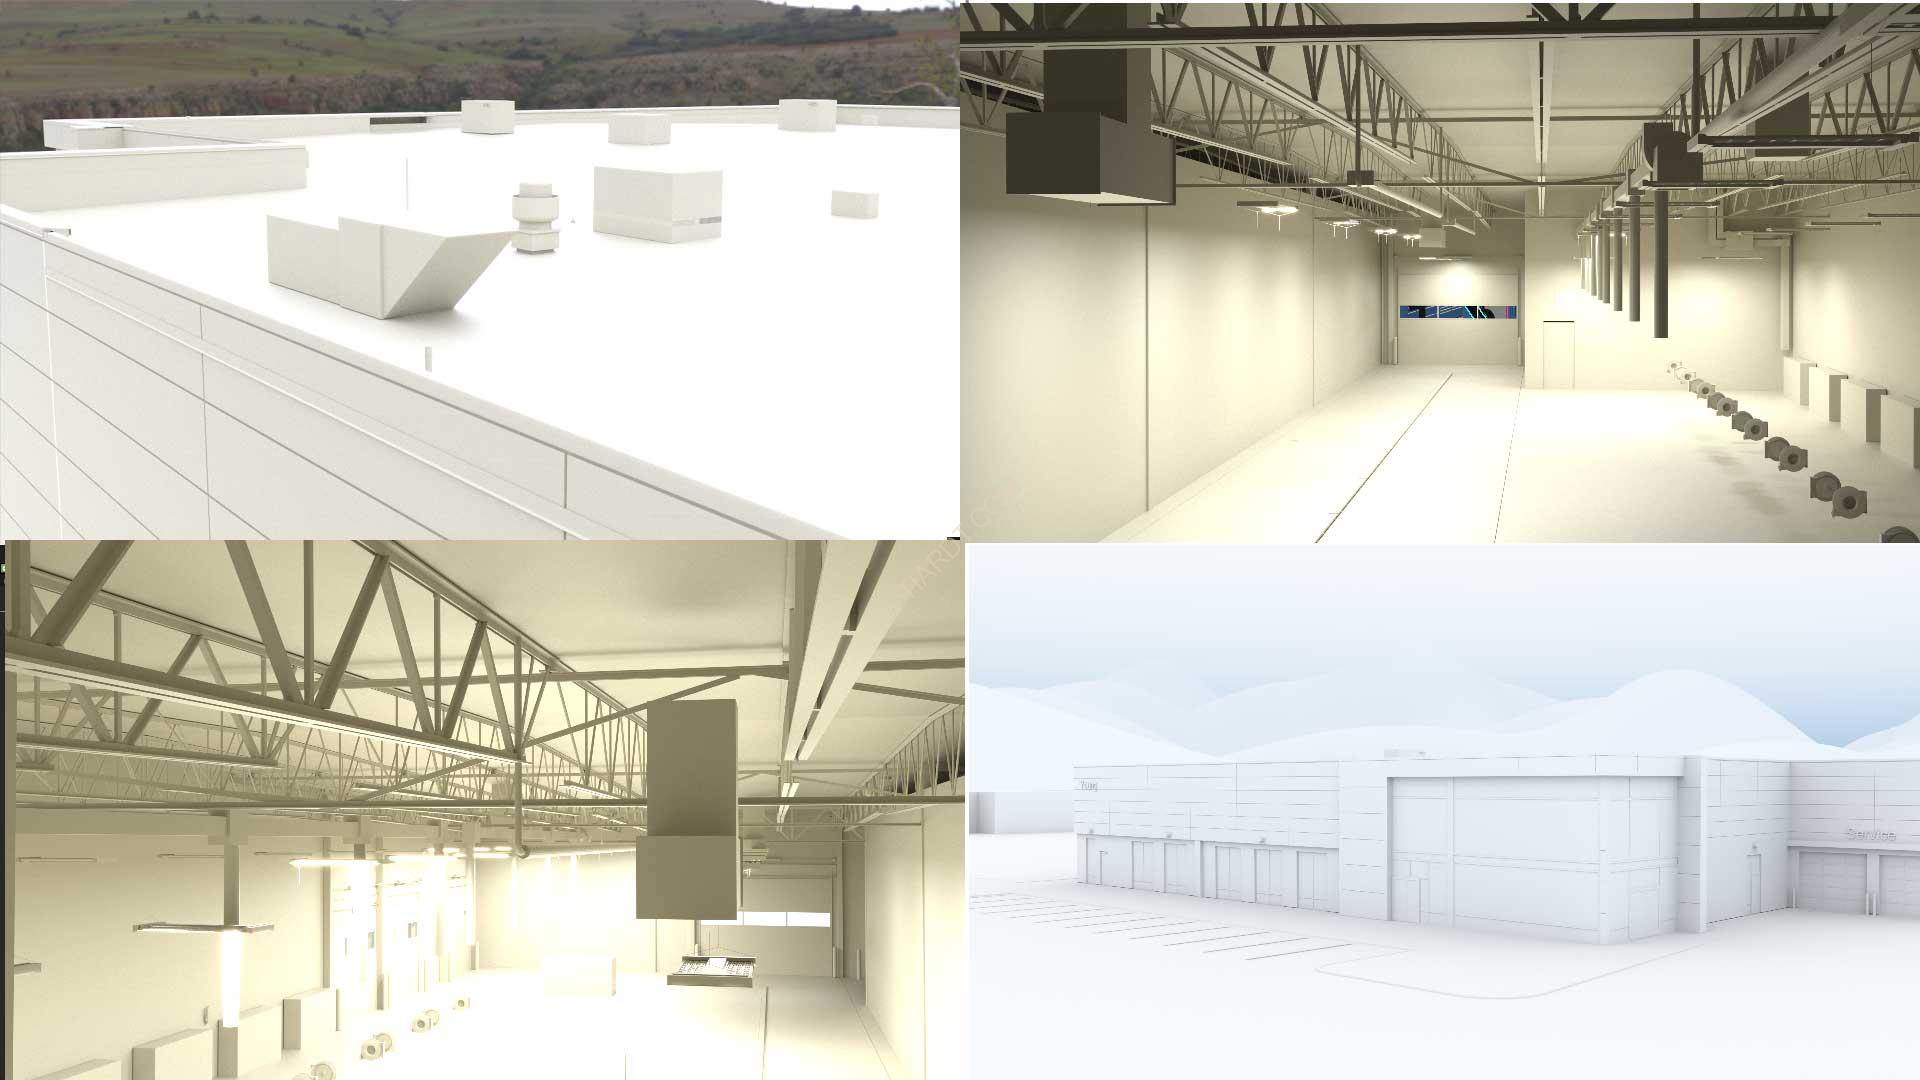
4. Test Various Angles
- Explore various camera angles and perspectives to find the best way to showcase the building and HVAC systems.
- In the past, I used to create detailed visualization drawings, but when faced with tight deadlines, I learned that using clay renders is the most efficient way to visualize the scene.
- Use clay renders for quick visualizations of the scene's composition and lighting without the distraction of textures and colors.
- Review the clay renders to identify the most effective angles and compositions.
- Choose the final composition that best highlights the client's desired features and focus points.
5. Model Unwrapping and Custom Texturing:
- When necessary, as was the case in this project, I unwrap certain models to prepare them for detailed texturing.
- I import the unwrapped models into Substance 3D Painter to bake various mesh maps, such as normal maps and roughness maps.
- I then create custom textures for these models.
- Sometimes, I split complex models into separate parts, especially when the buildings provided by architects, draftsmen, or clients contain intricate details.
- Once the models and props are fully textured in Substance 3D Painter, I import and convert the textures into V-Ray-supported materials, enhancing the models with realistic surface qualities.
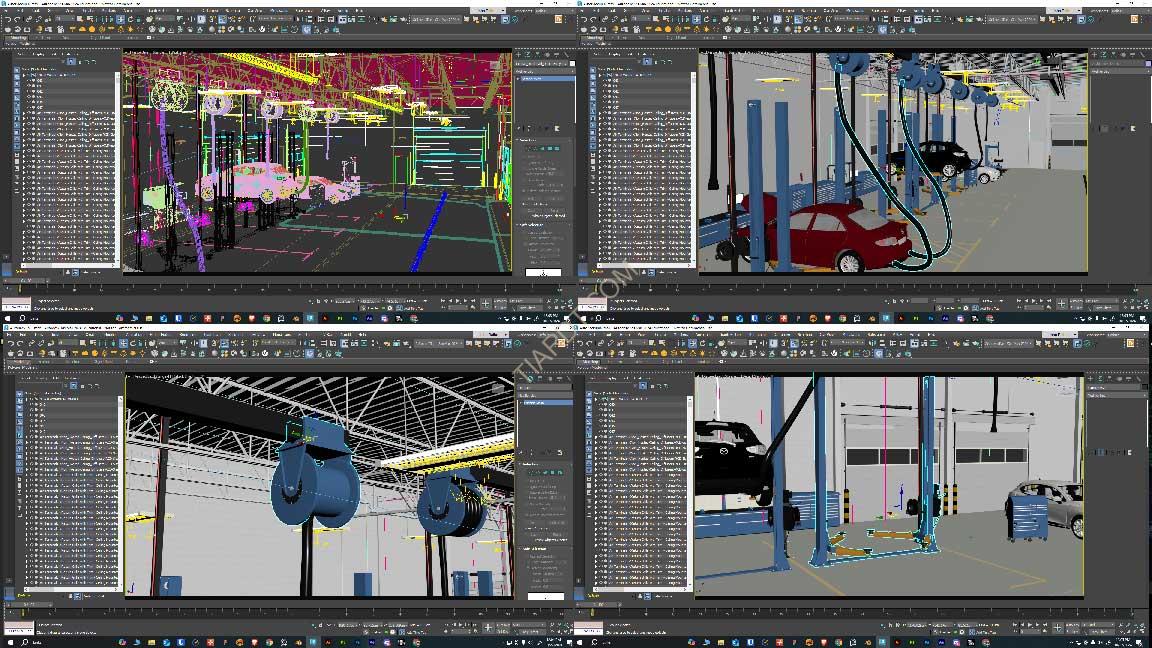
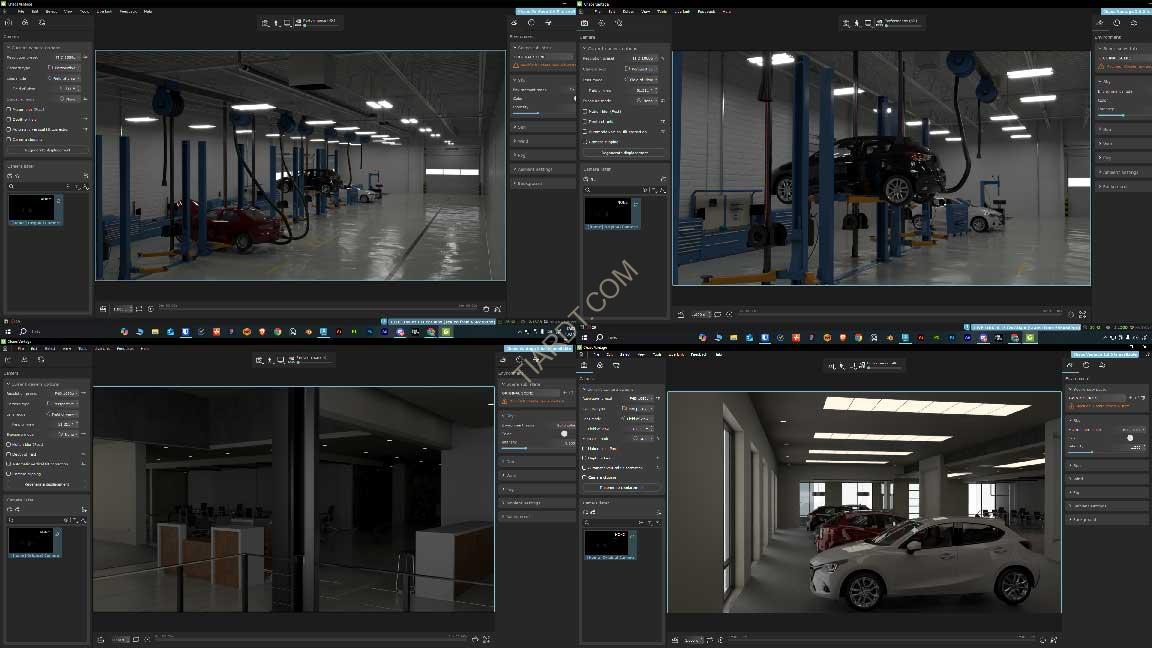
6. Refine Scene with V-Ray Vantage:
- After setting up the scene, use V-Ray Vantage to get a real-time view of the scene with textures applied.
- Adjust camera angles and compositions based on this textured, real-time view for a more accurate representation of the final output.
- Conduct high-quality V-Ray Vantage renders to evaluate the scene with its full textures and lighting.
- Use these renders to get a better feel for the final composition and make any necessary adjustments before proceeding to final rendering.
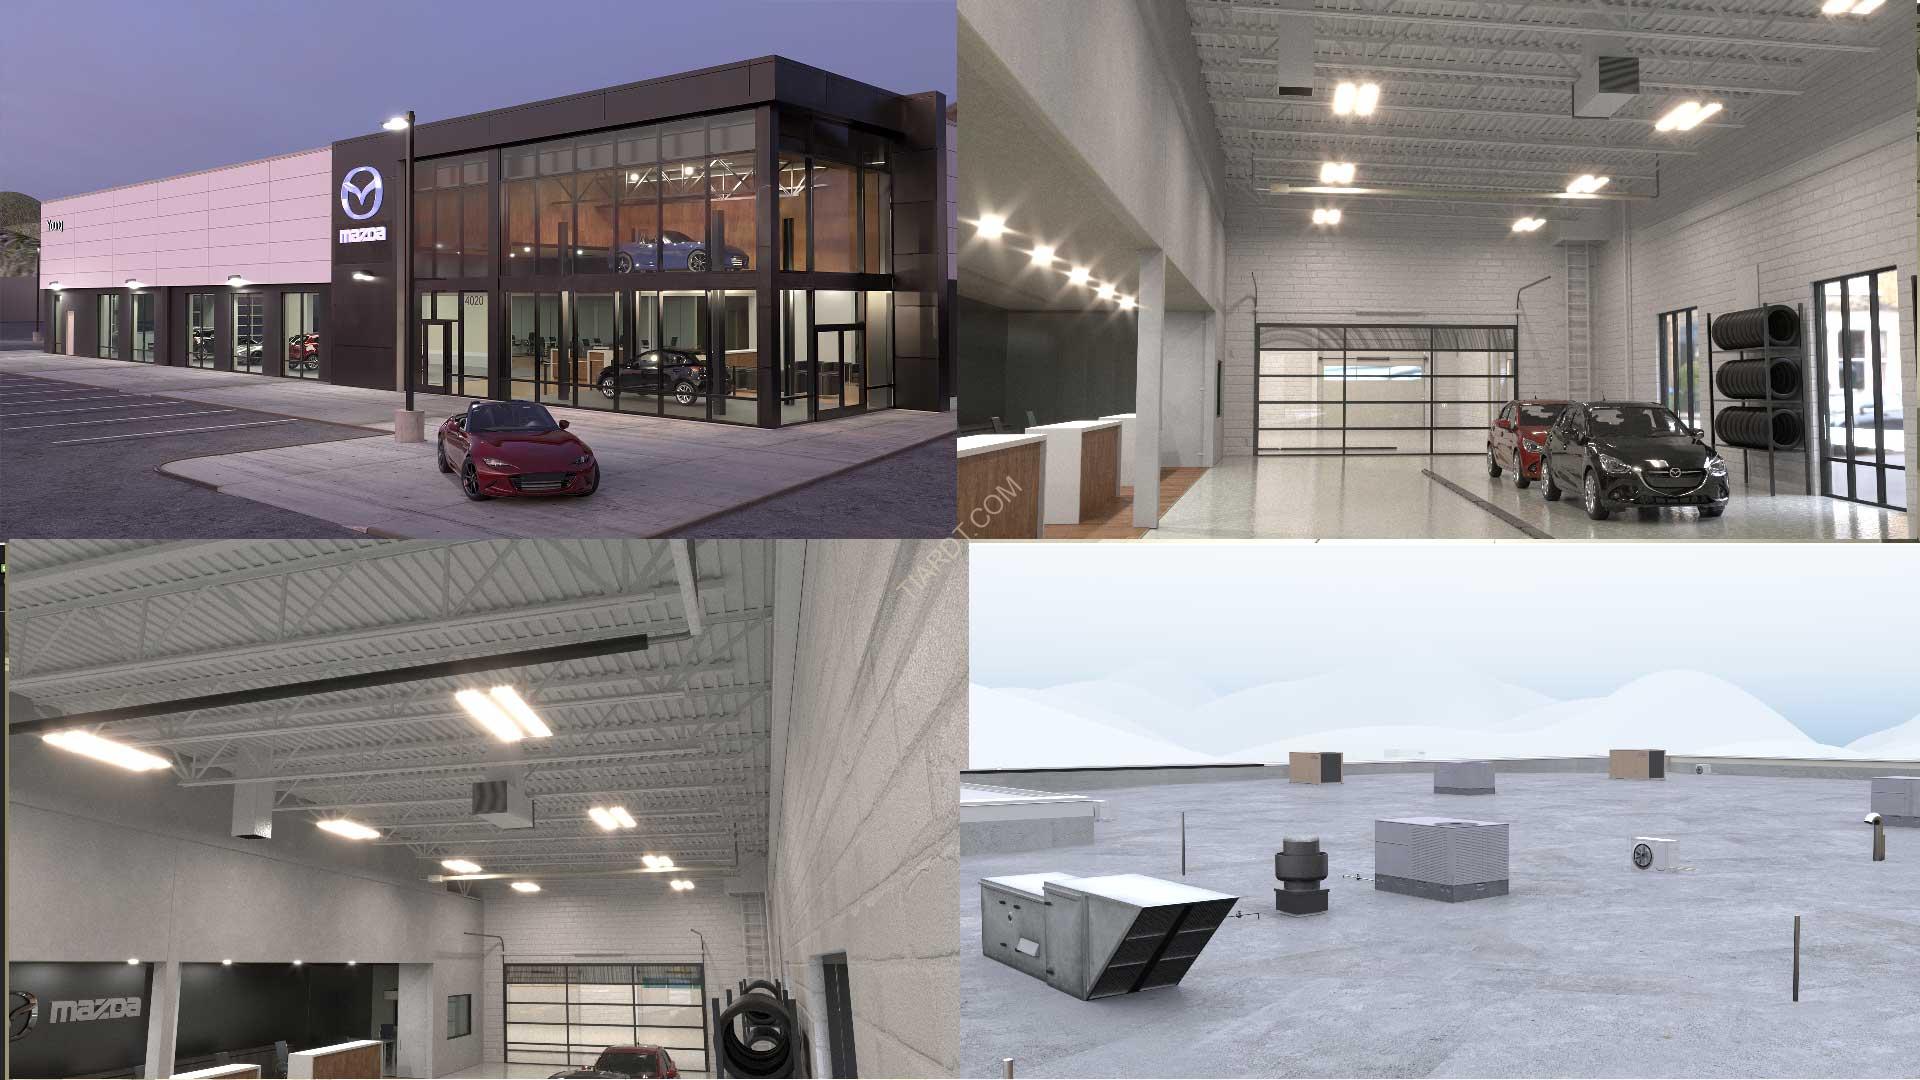
7. Final Scene Rendering:
- Once satisfied with the high-quality renders from V-Ray Vantage, proceed to the final rendering of the scene.
- Render the scene in both EXR format (for maximum flexibility in post-production) and PNG format (for high-quality, ready-to-use images).
- Ensure that all textures, lighting, and details are optimized for the final output before initiating the render process.
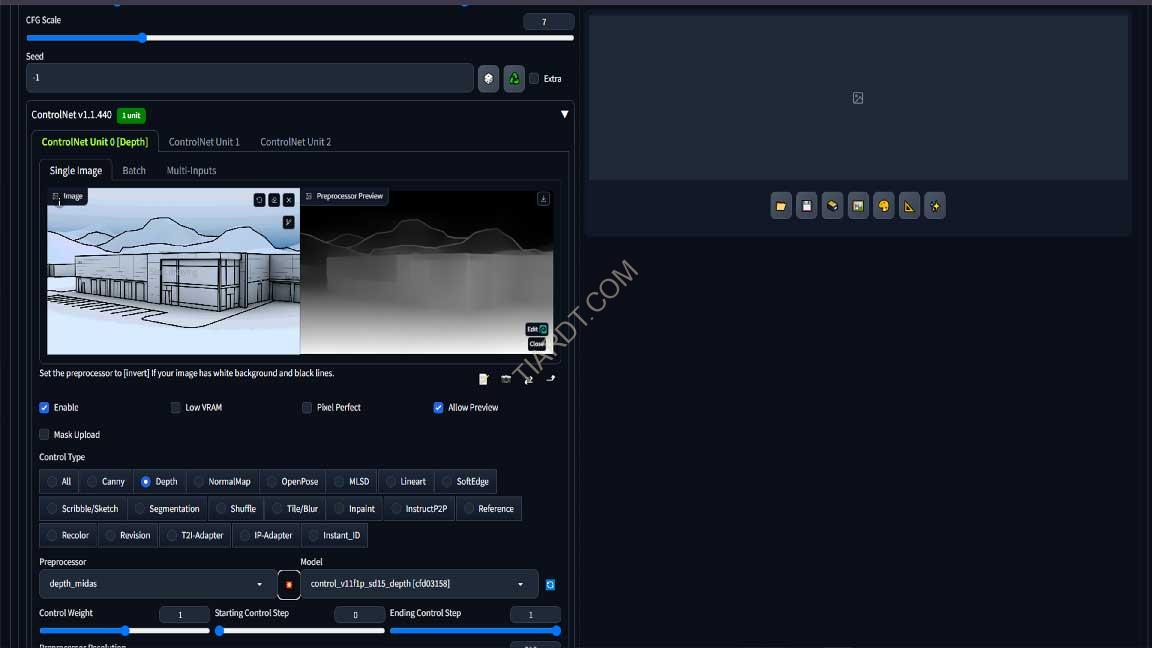
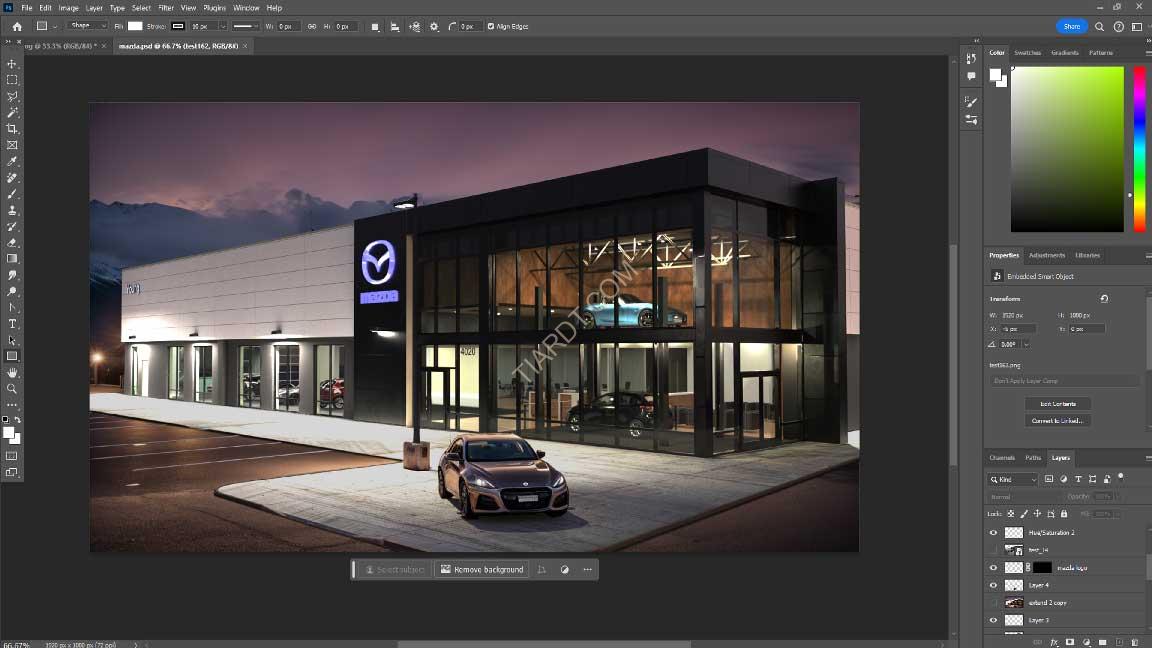
8. Final Touches with AI Enhancement:
- For the final touch, I use a combination of post-editing in Photoshop and AI tools like Stable Diffusion to enhance my renders.
- First, I create a clay render with a black stroke overlay, which helps define the shapes and edges of the scene.
- Then, I use Stable Diffusion's image-to-image tab, uploading the final render from Step 6, while placing the clay render in the ControlNet tab to guide the depth and structure.
- For ControlNet settings, I use the "depth_midas" preprocessor and "control_v11f1p" as the ControlNet model. My main Stable Diffusion model is a CC0 model called RealisticVision.
- I input relevant prompts—in this case, something like "photography of a car dealership, realistic environment"—to ensure the output matches the desired style.
- After generating around 20 images, I select the one that best aligns with the project’s vision. The AI-enhanced render provides realistic elements like roads and bushes, enriching the final result without replacing the core details of the original render.
9. Blending and Final Adjustments in Photoshop:
- I import both the final render from Step 6 and the selected Stable Diffusion-enhanced image into Photoshop.
- If necessary, I apply adjustments such as curves, levels, and other modifiers to refine the image further.
- Using manual blending techniques, I integrate the AI-generated details into the original render, ensuring a smooth and natural combination. When done correctly, this process adds significant depth and realism to the scene.
- I then utilize Photoshop’s generative fill to add additional elements like props, people, bushes, and trees, making the scene feel more complete and visually dynamic.
Additional Work:
Comparison Image of the Building Pre- and Post-Renovation
The client requested a comparison image to showcase a seamless transition between the new render and the building’s previous state before renovation. This would highlight the speed at which Brenkman and Company integrated their designs into the production timeline of the building’s transformation.
Reference Gathering:
- I began by researching building references prior to 2015, as there were limited visual records of the building's original design.
- Since the location previously housed a mattress store, I used historical Google Maps imagery to capture details of the older structure for accuracy.
Complete Scene Remodel:
- To accurately represent the original building, I had to completely remodel the scene due to notable ground height variations and architectural differences in the building’s structure.
Texturing for Realism:
- I applied textures to the building to make it appear aged and believable, capturing the wear and tear typical of a long-standing structure.
Modeling Additional Changes:
- I modeled any additional building changes needed to match the older design and stitched all elements together for a cohesive, pre-renovation look.
Adapting the Design Process:
- Following the above steps, I then applied the original design process to this scene as well, creating a realistic comparison image without altering the camera angle to maintain seamlessness between the two renders.
The result was a strikingly realistic side-by-side that successfully highlights the transformation, providing a visually compelling comparison for the client.
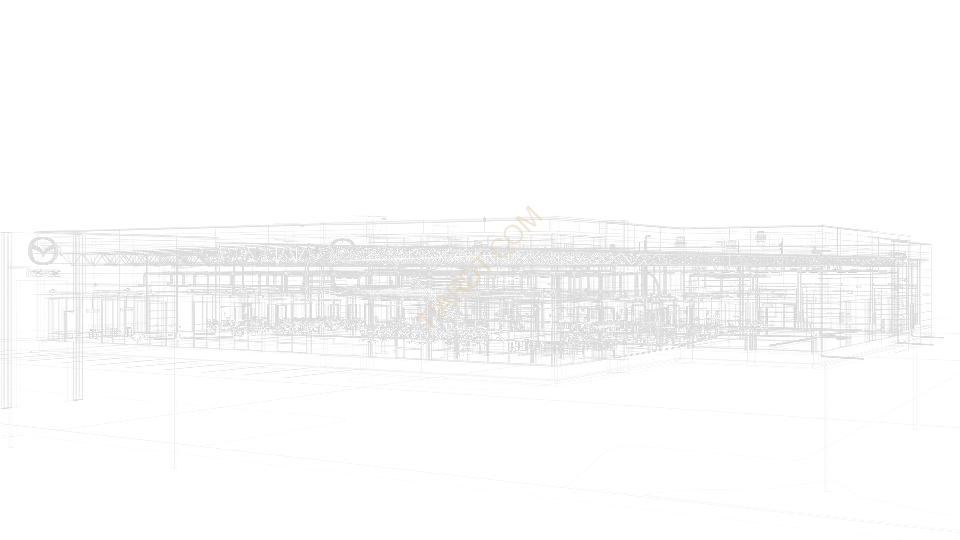
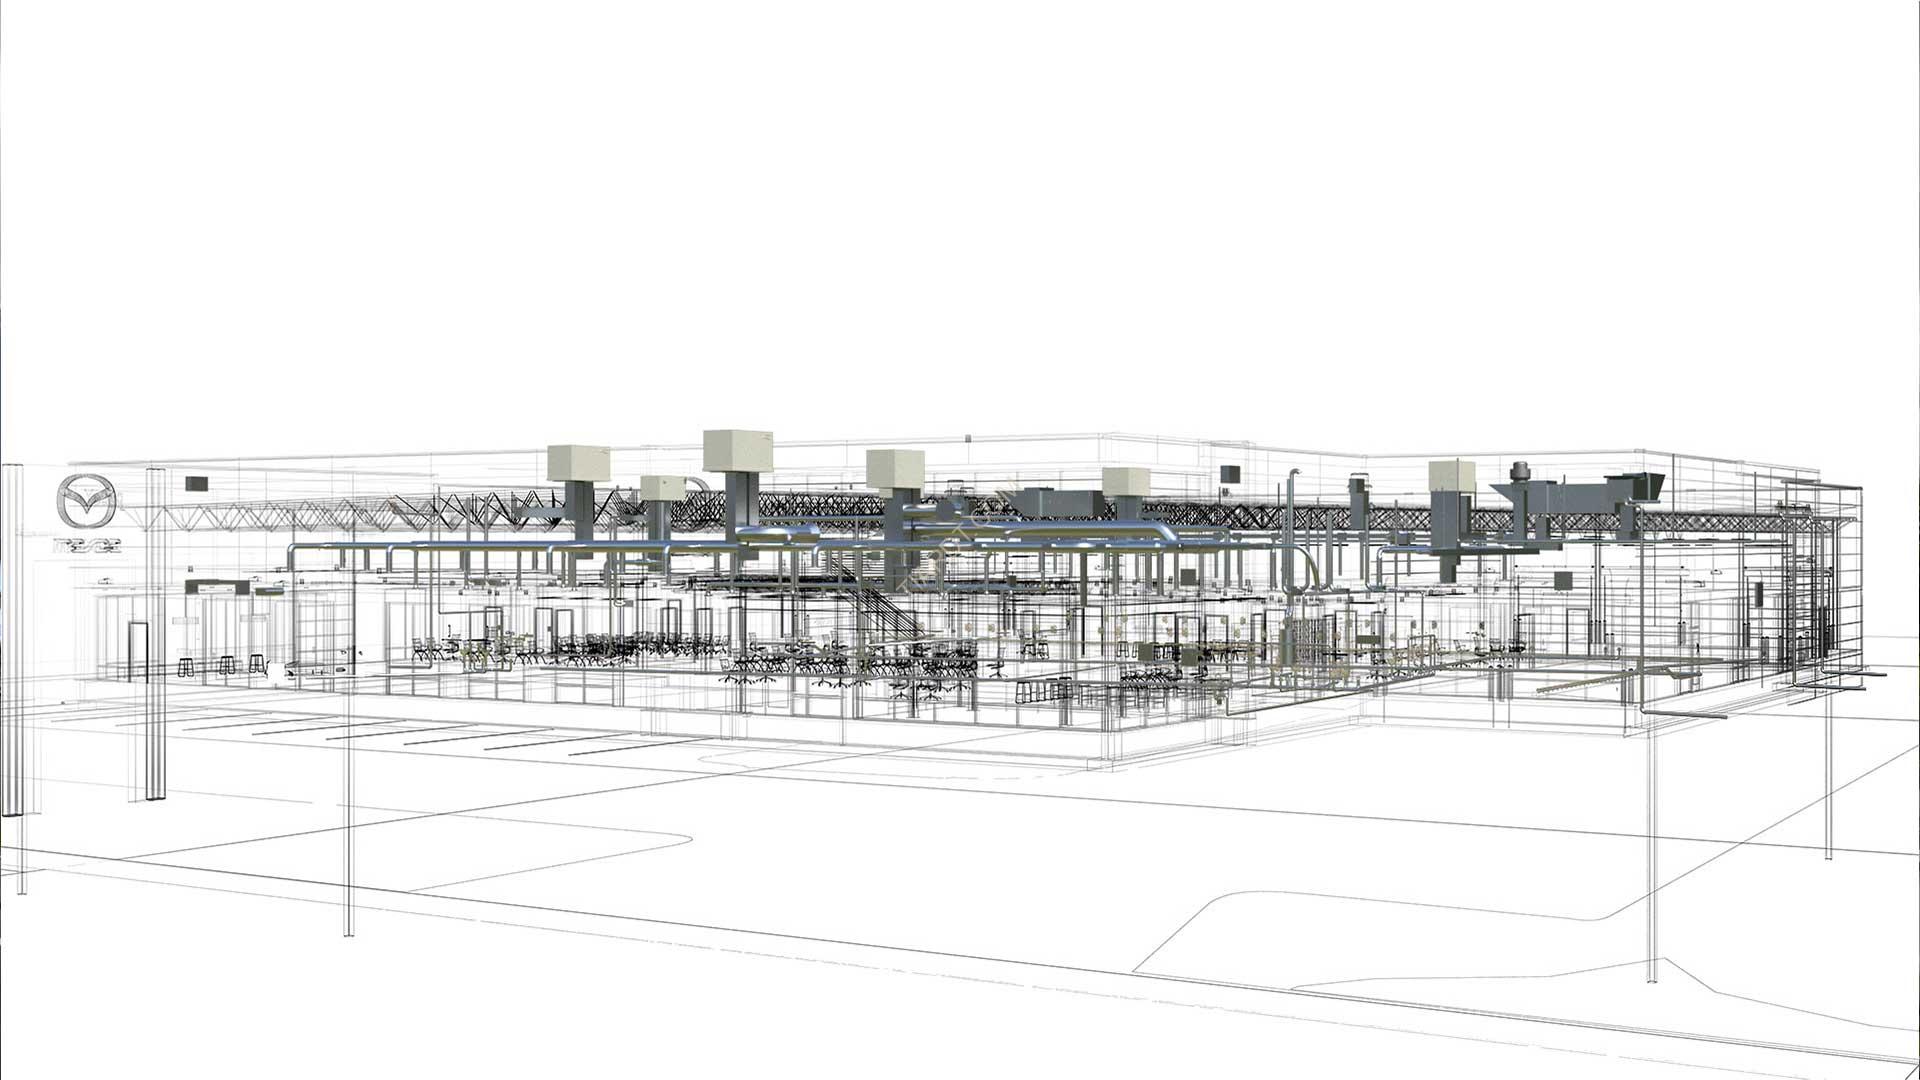
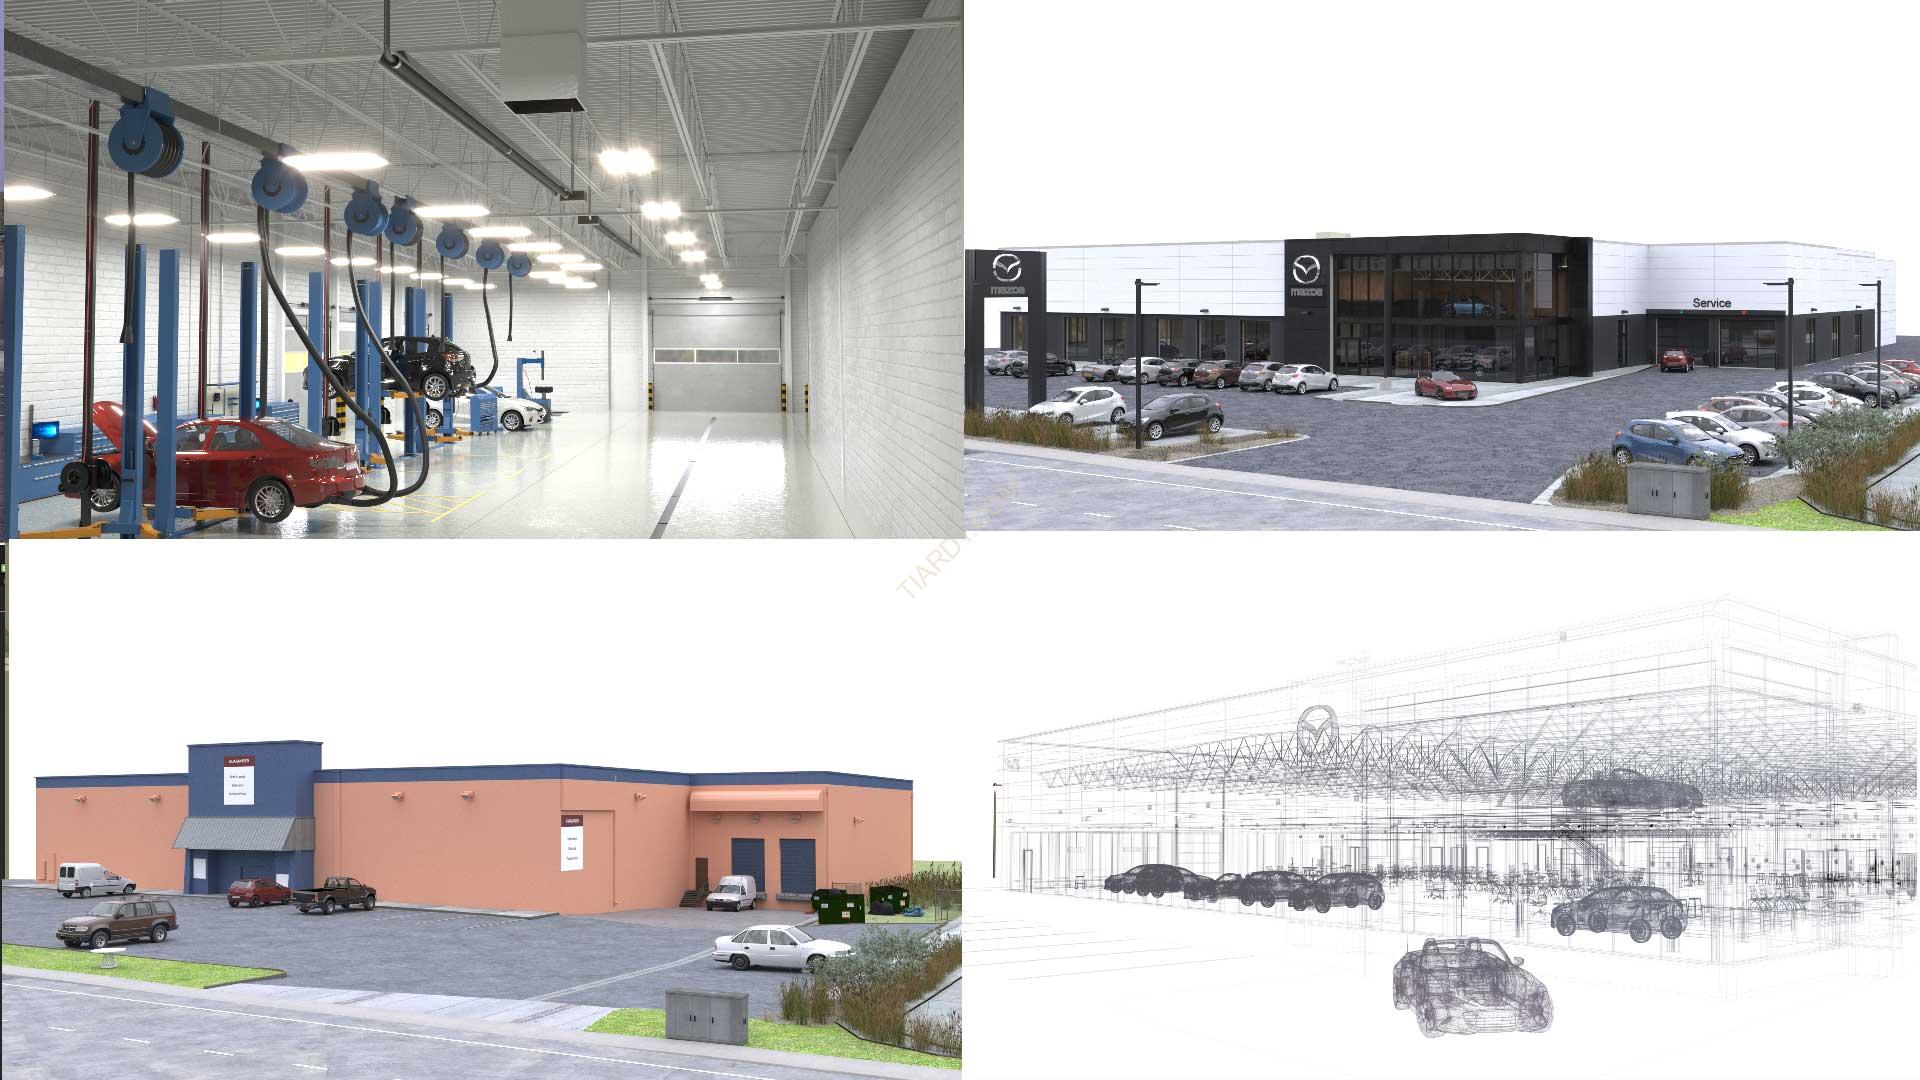
Wireframe Render Highlighting HVAC Integration
The client requested an additional wireframe render to clearly showcase the HVAC integration within the building. Here’s how I achieved this effect:
Wireframe Material Setup:
- I created a custom material preset where the fill was transparent, and the outline (stroke) was set to pure white. This produced a wireframe effect with a clear alpha channel in the render channels and a black background.
Separating Building and HVAC Renders:
- I rendered the building as a transparent wireframe, highlighting only the structural edges.
- For the HVAC system, I kept it fully textured and photorealistic, rendering it as a separate pass.
Compositing in Photoshop:
- I layered both renders in Photoshop. I then applied a color overlay to the wireframe’s alpha channel, giving it a “design or draft” appearance.
- By maintaining the HVAC system’s photorealism against the transparent building structure, I effectively made the HVAC system the focal point of the render, bringing visibility to components that would typically be hidden within the building.
Final Refinements:
- I made additional adjustments to further enhance contrast and clarity, achieving a polished result that highlights the HVAC system’s integration in an architecturally pleasing manner.
The resulting render effectively captures the complexity of the HVAC system within the transparent building, presenting a clean, draught-like aesthetic for easy viewing.